

Why Proper Leather Coat Storage Matters
A quality leather coat represents more than just a clothing purchase—it’s an investment in both style and durability that can last for decades when properly maintained. Leather, being a natural material, requires specific care to preserve its unique characteristics and prevent deterioration. Without proper storage techniques, your premium coat can suffer from irreversible damage including cracking, shape distortion, mold growth, and color fading.
What many coat owners don’t realize is that appropriate storage can extend a leather garment’s lifespan by two to three times compared to improperly stored items. When you consider that high-quality leather coats typically cost between $300-1000, proper storage becomes an essential aspect of protecting your investment.
At Metro Cloak, we’ve seen the dramatic difference between coats that have been carefully stored versus those that haven’t. Leather’s natural oils and porous structure make it particularly vulnerable during periods of disuse, requiring thoughtful preparation before tucking it away.
Key reasons proper storage matters:
– Prevents premature aging and deterioration
– Maintains the garment’s original shape and structure
– Preserves leather’s natural oils and suppleness
– Protects against environmental damage (humidity, dust, light)
– Ensures your coat remains ready to wear when needed again
This comprehensive guide will walk you through the essential steps of leather coat care and maintenance to ensure your favorite men’s leather coat remains in pristine condition for years to come.
Pre-Storage Cleaning: Essential First Steps
Before storing your leather coat for any length of time, proper cleaning is absolutely essential. Dirt, body oils, and environmental contaminants left on leather can permanently damage the material during storage, becoming deeply embedded and potentially causing discoloration or deterioration.
Follow these steps to ensure your coat is properly prepared:
Assess your leather type: Different leather finishes require specific cleaning approaches. Smooth leather can handle more direct cleaning than suede or nubuck.
Remove surface dust: Use a soft, dry cloth to gently wipe down the entire coat, paying special attention to collar, cuffs, and pockets where dirt accumulates.
Address specific stains: Tackle any visible stains before storage. For water-based stains, allow to dry completely then brush gently. For oil-based stains, apply a small amount of cornstarch to absorb the oil before cleaning.
Clean with appropriate products: Use a cleaner specifically formulated for your leather type. Apply with a soft cloth using gentle, circular motions without saturating the leather. Avoid household cleaners containing harsh chemicals that can strip leather’s natural oils.
Allow complete drying: Let your coat dry naturally at room temperature, away from direct heat sources which can cause the leather to crack or warp.
For premium leather garments, gentle techniques are crucial. Harsh scrubbing, excessive water, or improper cleaning solutions can damage the leather’s finish or structure. When in doubt, professional leather cleaning is worth considering, especially before long-term storage or for particularly valuable coats.
Common cleaning mistakes to avoid:
– Using household soaps or detergents that strip natural oils
– Soaking or saturating the leather
– Applying excessive pressure when cleaning
– Using colored cloths that might transfer dye
– Neglecting hard-to-reach areas like seams and folds
For detailed guidance on effectively cleaning your leather garment at home, our guide on how to clean a leather coat at home provides step-by-step instructions. Understanding the right types of leather cleaners for coats will ensure you’re using products that clean effectively without causing damage.
Conditioning: Preserving Leather’s Natural Moisture
After cleaning and before storing your leather coat, conditioning is a critical step that many owners overlook. Conditioning replenishes the natural oils in leather that prevent drying and cracking during storage. Think of it as providing your coat with essential nutrients before its long rest.
Your leather coat needs conditioning if it appears dull, feels stiff or dry to the touch, or if the leather surface shows tiny lines when gently flexed. These are signs that the natural moisture has depleted and needs restoration.
Follow this conditioning process for best results:
- Ensure your coat is completely clean and dry
- Apply a small amount of conditioner to a soft cloth (never directly to the leather)
- Work the conditioner into the leather using small, circular motions
- Apply thin, even layers rather than one heavy application
- Pay special attention to high-flex areas like elbows and seams
- Allow the conditioner to absorb completely (typically 24 hours) before storage
- Buff gently with a clean cloth to remove excess product
Different leather types have varying conditioning needs. Softer leathers may require more frequent conditioning, while heavily treated leathers might need less. For optimal results, condition your coat 48-72 hours before packing it away to allow complete absorption.
| Conditioner Type | Best For | Application Frequency | Special Benefits |
|---|---|---|---|
| Lanolin-based | Natural finish leather | Every 6-12 months | Deep moisturizing for vintage leather |
| Beeswax-based | Outdoor/rugged coats | Every 12 months | Water-resistance properties |
| Mink oil | Heavy-use leather | Before storage only | Intense moisturizing for dry leather |
| Cream conditioners | Lightweight leathers | Every 3-6 months | Gentle nourishment without darkening |
Properly conditioned leather maintains its suppleness and flexibility during storage, dramatically reducing the risk of cracking or brittleness. The difference between conditioned and non-conditioned leather after months of storage can be stark—conditioned leather remains soft and pliable, while untreated leather often becomes stiff and may develop permanent creases or cracks.
For in-depth information on this crucial step, our detailed guide on leather coat conditioning expert tips provides advanced techniques. These methods are particularly important for premium items like men’s leather shearling coats which have specialized care requirements due to their combination materials.
Ideal Storage Environment: Temperature, Humidity and Light
The environment where you store your leather coat is perhaps the single most important factor in determining how well it will preserve over time. Even perfectly cleaned and conditioned leather can deteriorate quickly when exposed to improper conditions.
Temperature Control
The ideal temperature range for leather storage is between 60-75°F (15-24°C). Extreme temperatures cause significant damage:
- Too hot: Causes leather to dry out, potentially crack, and lose shape
- Too cold: Can make leather brittle and prone to cracking when moved
- Fluctuating temperatures: Create expansion and contraction that stress the material
Humidity Management
Maintaining relative humidity between 40-60% provides the optimal environment for leather storage:
- Too humid (above 65%): Promotes mold and mildew growth
- Too dry (below 30%): Causes leather to lose moisture and crack
- Fluctuating humidity: Creates cycles of absorption and evaporation that stress the leather
Light Exposure
Light, especially direct sunlight and fluorescent lighting, can cause fading and deterioration of leather:
- UV rays break down leather fibers over time
- Color fading occurs most rapidly in direct sunlight
- Even ambient light can cause gradual deterioration over long storage periods
Best Home Storage Locations
- Interior closets: Ideal when located on interior walls away from external temperature fluctuations
- Spare bedrooms: Good options if climate controlled and not subject to temperature extremes
- Under-bed storage: Can work well if using appropriate breathable containers
Locations to Absolutely Avoid
- Attics: Temperature fluctuations and extreme heat in summer
- Basements: Often too humid and prone to flooding
- Garages: Uncontrolled temperature and humidity, plus exposure to car fumes
- Plastic bins: Create condensation and trap moisture against leather
Improving Less-Than-Ideal Spaces
If perfect conditions aren’t available, consider these modifications:
– Use a dehumidifier in damp spaces
– Add moisture via a humidifier in overly dry environments
– Install a small hygrometer (humidity meter) to monitor conditions
– Consider silica gel packets to absorb excess moisture in storage containers
Understanding proper environmental conditions is critical for preventing leather coat cracks and maintaining the appearance of items like men’s black leather coats, which can be particularly susceptible to showing damage.
The Perfect Hanger: Supporting Your Coat’s Structure
Using the correct hanger is not merely a matter of organization—it’s essential for maintaining your coat’s shape and preventing structural damage during storage. A proper hanger distributes weight evenly, supports the shoulders, and prevents stretching or distortion.
Ideal Hanger Characteristics
The best hangers for leather coats feature:
– Wide, contoured shoulders that mimic human shoulders
– Thick padding to prevent pressure points and creases
– Strong construction to support heavier leather garments
– Wooden or padded plastic construction
– Adequate width to maintain proper shoulder alignment
Hangers to Avoid
Never use these hanger types for leather coat storage:
– Wire hangers: Create pressure points and deform shoulders
– Thin plastic hangers: Lack adequate support and may snap under weight
– Clip-style hangers: Create permanent marks and stress points
– Undersized hangers: Cause shoulders to droop and lose shape
Hanging Techniques for Different Coat Styles
Heavy, Structured Coats:
– Use the sturdiest, widest hangers available
– Ensure the coat sits squarely on the hanger with shoulders aligned
– Fasten middle buttons or zippers to maintain shape
– Leave adequate space between garments for air circulation
Lighter, Softer Leather:
– Choose medium-weight padded hangers
– Avoid overstretching by ensuring proper fit
– Consider buttoning/zipping to maintain structure
– Allow extra space between garments to prevent creasing
When proper hangers aren’t available, you can temporarily improvise by:
– Padding a basic hanger with acid-free tissue paper
– Using a rolled towel over a standard hanger to increase width
– Placing acid-free tissue in the shoulders for added structure
The damage from improper hangers may not be immediately visible but becomes apparent over time. Shoulders that sag, permanent creases at stress points, and stretched areas are all consequences of using inadequate hangers during storage.
For additional insights on proper leather garment care, our guide on mastering black leather jacket care provides complementary information on handling and maintaining structured leather outerwear.
Protective Covers: What to Use and Avoid
The right protective cover shields your leather coat from dust, light damage, and airborne contaminants while still allowing the leather to breathe. The wrong cover, however, can trap moisture and accelerate deterioration.
Breathable Cover Materials
Cotton Canvas Garment Bags
– Allow air circulation while protecting from dust
– Natural fibers won’t interact negatively with leather
– Opaque material blocks damaging light
– Durable enough for long-term storage
100% Cotton Sheets or Pillow Cases
– Excellent breathable DIY options
– Inexpensive and readily available
– Can be washed regularly to remove dust
Professional Garment Bags
– Look for “breathable” explicitly mentioned
– Avoid those with plastic components
– Choose options with proper length to cover entire coat
Covers to Absolutely Avoid
Plastic Dry Cleaner Bags
– Trap moisture against leather
– Create condensation in temperature changes
– Prevent necessary air circulation
– Can lead to mold growth and mildew
– May contain chemicals that transfer to leather over time
Plastic Storage Bins
– Create microenvironments with humidity fluctuations
– Frequently cause condensation
– Restrict airflow needed for leather health
Proper Covering Technique
- Ensure coat is completely clean and dry before covering
- Button or zip coat to maintain proper shape
- Place cover over coat while on proper hanger
- Leave small opening at bottom for air circulation
- Never compress or pack tightly in storage container
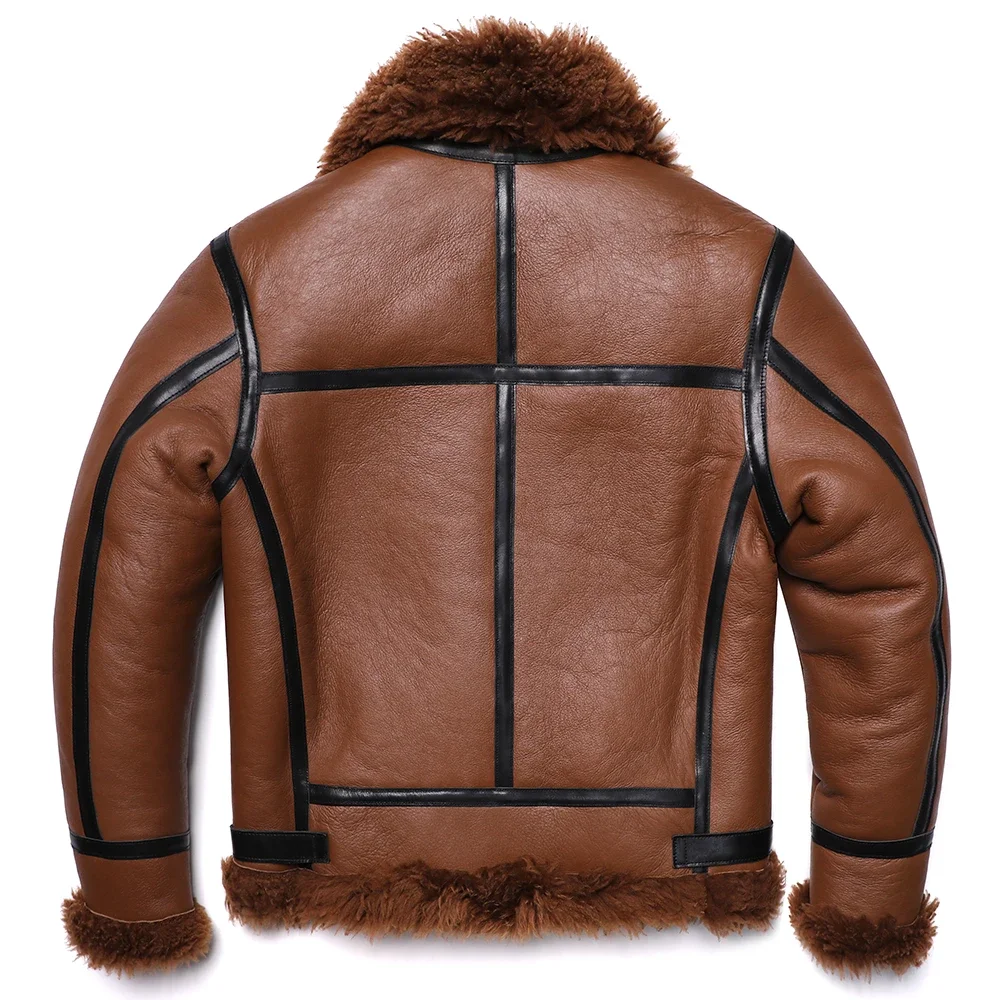
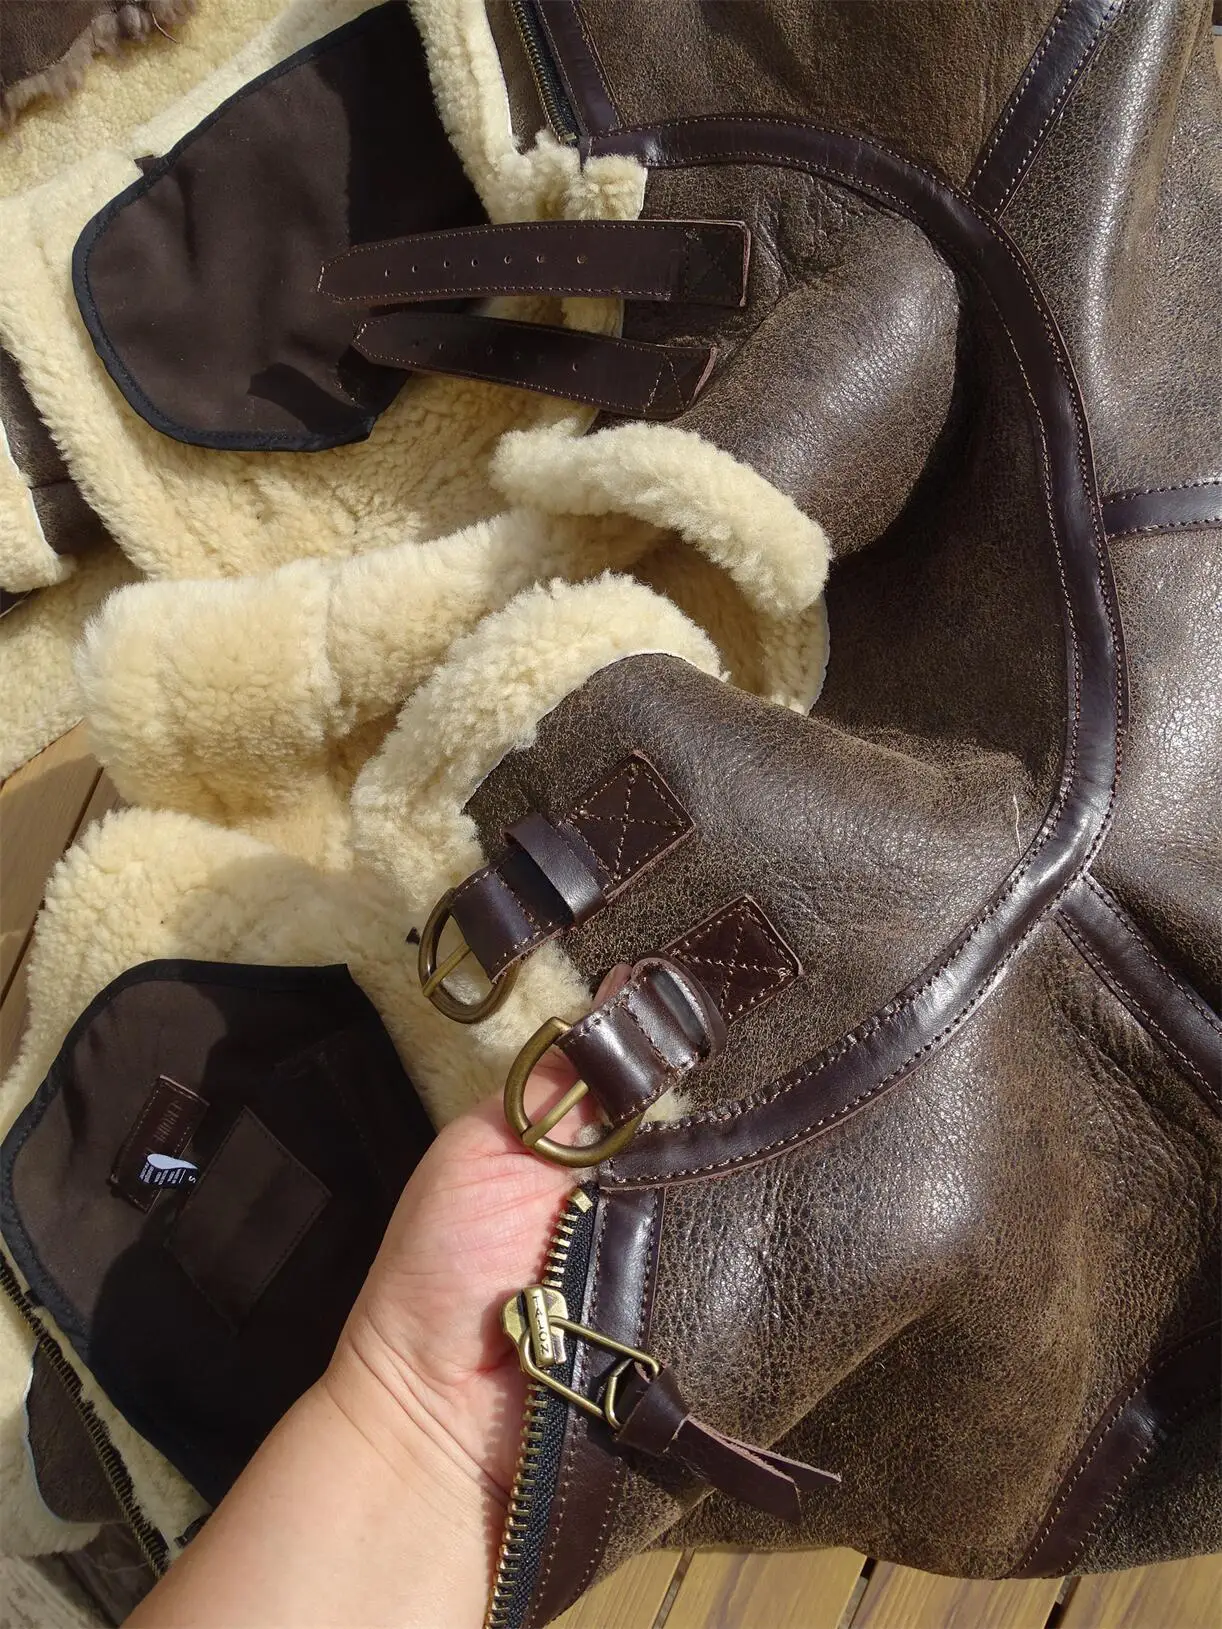
Special Considerations for Fur or Shearling Elements
Coats with fur or shearling components, like many in our men’s shearling coat collection, require additional considerations:
- Ensure fur components are thoroughly brushed before storage
- Give additional space to prevent crushing fur or shearling
- Consider specialized covers designed for fur garments
- Position fur/shearling elements so they’re not compressed against hard surfaces
- Allow extra air circulation to prevent odor development
Pros of proper breathable covers:
– Dust protection without moisture entrapment
– Light protection preventing fading
– Physical barrier against airborne contaminants
– Protection from accidental spills or contact with damaging substances
Cons of improper covers:
– Trapped moisture leading to mold growth
– Chemical interaction between cover and leather
– Inadequate breathability causing leather to dry out
– Potential color transfer from dyed covers to leather

Stuffing and Support: Maintaining Shape During Storage
Proper internal support prevents creases and maintains your leather coat’s shape during storage. Without appropriate stuffing, leather can develop permanent lines and lose its intended structure, especially in areas prone to folding like sleeves and collars.
Step-by-Step Stuffing Technique
Start with sleeves: Insert acid-free tissue paper or clean white cotton cloth into sleeves, working from shoulder to cuff. Fill to maintain natural shape without overstretching.
Support collar and lapels: Gently place rolled acid-free tissue under collar and behind lapels to maintain their proper stand and shape.
Fill body cavity: Add light stuffing to the body section, focusing on areas prone to folding or creasing. The goal is to provide gentle support, not firm packing.
Address detail areas: Pay special attention to pockets, cuffs, and decorative elements that might collapse or crease without support.
Check overall shape: After stuffing, assess the coat’s silhouette to ensure it maintains its natural form without strain on seams or fasteners.
Best Stuffing Materials
- Acid-free tissue paper: pH-neutral and won’t transfer chemicals to leather
- Clean white cotton sheets or pillowcases: Breathable and gentle on leather
- White cotton t-shirts or towels: Good for larger support areas
- Commercial archival stuffing products: Designed specifically for garment preservation
Materials to Avoid
- Newspaper: Contains acids and ink that transfer to leather
- Colored tissue paper: Dyes can bleed onto leather when humidity fluctuates
- Synthetic materials: May cause condensation against leather
- Bubble wrap or plastic: Prevents airflow and causes moisture buildup
Proper stuffing should create gentle support without stretching the leather. Overstuffing is just as harmful as understuffing—it places strain on seams and can permanently stretch the leather beyond its natural dimensions.
Different coat styles require different approaches:
– Structured motorcycle jackets need firmer support in collars and shoulders
– Softer, drapey trench styles require lighter, more distributed stuffing
– Quilted or textured leather needs special attention to maintain pattern definition
For detailed guidance on extended care techniques, our long-term leather coat care guide provides comprehensive information on preserving your investment pieces over years or even decades.
Leather Coat Folding: When Necessary and How to Do It Right
While hanging is almost always the preferred storage method for leather coats, certain circumstances may necessitate folding—perhaps during travel, in extremely limited storage spaces, or when proper hanging facilities aren’t available. When folding becomes necessary, following proper technique is crucial to minimize damage.
When Folding Might Be Unavoidable
- During travel in luggage
- In very limited closet or storage space
- For temporary storage during moves
- In specialty storage units with limited vertical space
Proper Folding Technique
- Clean and condition your coat thoroughly before folding
- Place acid-free tissue along all fold lines to create rounded rather than sharp creases
- Fold sleeves first, laying them across the back of the coat with tissue at elbow folds
- Create the main fold at the middle of the coat, placing a generous layer of tissue paper at the fold line
- Avoid multiple folds if possible—aim for just one main fold
- Store folded coat on a flat surface, not under heavy items
- Refold periodically (every 2-4 weeks) along different lines to prevent permanent creases
Maximum Recommended Folding Duration
For premium leather coats like our men’s brown leather coat collection, folding should be limited to:
– 2-3 days for travel
– 2-3 weeks for temporary storage
– No more than 1 month even with periodic refolding
Removing Creases After Folded Storage
- Hang coat on proper hanger in steamy bathroom (not in direct contact with water)
- Allow gentle humidity to relax creases
- After leather is slightly relaxed, reshape by hand
- For stubborn creases, consult a professional leather specialist
Remember that every fold creates stress on the leather fibers, and repeated folding in the same location can lead to permanent damage. Always prioritize hanging storage when possible, and consider folding only as a temporary solution.
Long-Term Storage Maintenance: Periodic Care
Even properly prepared leather coats require ongoing attention during storage periods. Regular maintenance checks prevent minor issues from developing into permanent damage and ensure your coat remains in optimal condition until you’re ready to wear it again.
Maintenance Check Schedule
Monthly Checks:
– Inspect for early signs of mold or mildew
– Check for pest activity or damage
– Ensure storage area maintains proper humidity/temperature
– Confirm coat maintains proper shape on hanger
Seasonal Checks (every 3-4 months):
– Remove coat from cover for thorough inspection
– Allow gentle air circulation for several hours
– Reposition stuffing materials to prevent pressure points
– Check condition of leather for drying or other concerns
Annual Maintenance:
– Consider light reconditioning if leather shows signs of drying
– Replace storage materials (tissue, covers) if needed
– Thoroughly air out coat for 24-48 hours
– Reset shoulders and reshape if needed
What to Look For During Checks
- White or green spots: Indicates mold/mildew development
- Unusual odors: Can signal moisture problems or pest activity
- Stiff or brittle areas: Shows leather drying or improper humidity
- Dust accumulation: May require refreshed cover or storage area cleaning
- Distorted shape: Indicates improper hanging or support
Air-Out Procedure
- Choose a cool, dry day with low humidity
- Remove coat from cover and remove all stuffing
- Hang on proper hanger away from direct sunlight
- Allow 4-8 hours of air circulation in a clean environment
- Check thoroughly before returning to storage
Pest Prevention for Leather Storage
- Keep cedar blocks near (but not touching) leather items
- Consider lavender sachets as a natural deterrent
- Avoid mothballs which can damage leather and transfer odors
- Keep storage areas clean and regularly vacuumed
- Monitor for signs of pests during routine checks
Proper maintenance during storage significantly enhances the protection of your leather jacket and prevents unwelcome surprises when you retrieve your coat for use.
Bringing Your Coat Out of Storage: Revival Techniques
When the time comes to return your leather coat to active use, a proper revival process helps transition it from storage to wearable condition. This methodical approach ensures your coat looks its best and helps identify any issues that may have developed during storage.
Step-by-Step Revival Process
- Remove the protective cover carefully to avoid catching on buttons or details
- Remove all stuffing materials gently, checking for any signs of damage
- Hang the coat in a well-ventilated area away from direct sunlight for 24-48 hours
- Inspect thoroughly for any issues that may have developed during storage
- Brush gently with a soft-bristled brush to remove any dust
- Assess conditioning needs by checking leather flexibility and appearance
Condition Assessment After Storage
Test your leather’s condition by:
– Gently flexing a small, inconspicuous area to check for suppleness
– Looking for dull or dry patches that may need conditioning
– Checking stress points (elbows, seams) for stiffness or cracking
– Assessing overall drape and movement of the garment
Light Reconditioning Technique
If your coat feels slightly dry after storage:
1. Select an appropriate leather conditioner
2. Apply a small amount to a clean, soft cloth
3. Work into leather using gentle circular motions
4. Focus on areas showing dryness or stiffness
5. Allow to absorb completely before wearing (typically 24 hours)
6. Buff gently with a clean cloth
When to Seek Professional Help
Consider professional leather care services if:
– Mold or mildew has developed
– Significant creasing or shape distortion has occurred
– Leather shows cracking or severe dryness
– Color has faded or changed unevenly
– Unusual odors persist after airing out
The transition from storage to regular wear should be gradual. Allow your coat to fully acclimate to normal wearing conditions before exposing it to harsh weather or wearing for extended periods.
For coats with special features or requirements, our ultimate guide to men’s long winter coats provides specific revival techniques tailored to heavier, more structured garments.

Mens Leather Coat, Mens Long Leather Coat
Price range: $225.22 through $235.58 Select options This product has multiple variants. The options may be chosen on the product page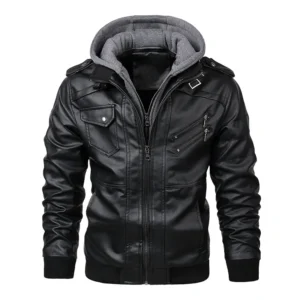

Mens Black Leather Coat, Mens Leather Coat
Price range: $181.52 through $197.20 Select options This product has multiple variants. The options may be chosen on the product page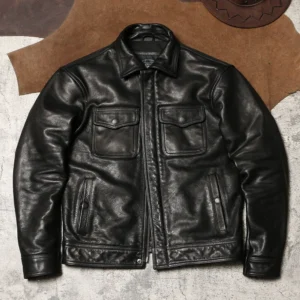
Mens Brown Leather Coat, Mens Leather Coat
$846.94 Select options This product has multiple variants. The options may be chosen on the product page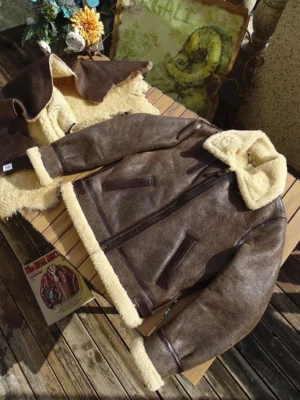
Mens Shearling Coat, Mens Sheepskin Coat
$888.08 Select options This product has multiple variants. The options may be chosen on the product page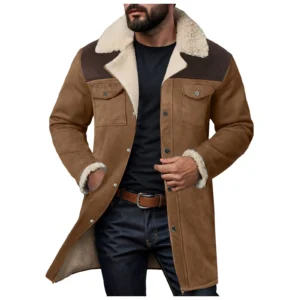 Price range: $96.28 through $130.88 Select options This product has multiple variants. The options may be chosen on the product page
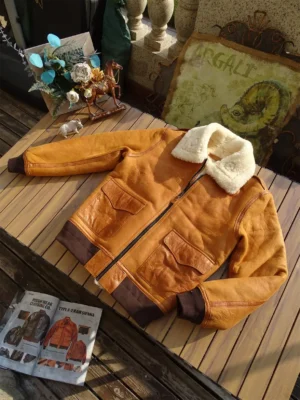
Mens Shearling Coat, Mens Sheepskin Coat
$2,257.19 Select options This product has multiple variants. The options may be chosen on the product page
Common Storage Mistakes to Avoid
Even with the best intentions, certain storage practices can significantly damage your leather coat. Being aware of these common pitfalls can help you avoid costly mistakes and preserve your investment for years to come.
• Using plastic bags or containers: Creates a moisture trap that can lead to mold growth and leather deterioration
• Storing in basements or attics: Exposes leather to temperature extremes and humidity fluctuations that cause premature aging
• Hanging on wire or thin plastic hangers: Creates shoulder deformations and stress points that permanently alter your coat’s shape
• Storing without cleaning first: Allows oils, dirt and environmental contaminants to set into the leather, causing stains and deterioration
• Over-conditioning before storage: Creates a sticky surface that attracts dust and can develop an unpleasant odor
• Storing in direct sunlight or near heat sources: Causes fading, drying, and potential cracking of leather
• Cramming into crowded closets: Creates pressure points, creases, and distortions in the leather’s shape
• Ignoring periodic maintenance checks: Allows small issues to develop into significant damage during long storage periods
• Using newspaper as stuffing: Transfers ink to leather and contains acids that damage the material over time
• Storing near household chemicals: Vapors from cleaning products, paints, and other chemicals can damage leather’s finish
The cost implications of these mistakes can be significant—professional restoration of a damaged leather coat often starts at $200 and can exceed the original purchase price in severe cases. More importantly, some damage simply cannot be repaired, permanently reducing both the appearance and value of your investment.
For additional insight on proper leather care and common misconceptions, our guide on how to oil your leather jacket addresses frequently misunderstood aspects of leather maintenance.
FAQ: Leather Coat Storage Questions
Can I store multiple leather coats together?
Yes, but maintain adequate space between garments to allow airflow and prevent color transfer. Each coat should have its own proper hanger and breathable cover. Never compress multiple coats tightly together, as this creates pressure points and restricts necessary air circulation.
What’s considered “long-term” storage for leather coats?
Any storage period exceeding one month is generally considered long-term and requires more thorough preparation. Storage exceeding six months should include periodic maintenance checks and repositioning to prevent permanent creasing or shape distortion.
Which leather types need special storage consideration?
Suede and nubuck require extra protection from moisture and should never be stored in plastic. Exotic leathers (snake, alligator) need more frequent conditioning before storage. Softer, more supple leathers benefit from extra support to maintain shape. Dyed leathers, especially bright colors, need protection from light to prevent fading.
Is faux leather storage different from real leather?
Yes, synthetic leather generally requires less conditioning but is actually more vulnerable to temperature extremes. Faux leather can crack and deteriorate more quickly in improper storage conditions, and unlike real leather, cannot be restored once damaged. It’s still best to use breathable covers and proper hangers, but conditioning is typically unnecessary.
Should I use cedar blocks or mothballs when storing leather?
Cedar blocks placed near (but not touching) leather garments can help deter pests without damaging the leather. Never use mothballs, as they contain chemicals that can damage leather and transfer persistent odors. Lavender sachets offer a natural alternative that repels insects without harming leather.